Deploy Quanton on EKS Auto Mode
This guide walks through deploying the Quanton Operator on an Amazon EKS Auto Mode cluster — from creating the cluster to running your first Spark job.
Auto Mode is the lowest-touch way to run Quanton on Kubernetes. Compared to a standard EKS cluster, you don't create or size node groups, pick instance types, install an autoscaler, or patch node operating systems. AWS manages the compute lifecycle for you (a managed version of Karpenter): nodes are provisioned on demand when pods are pending, right-sized automatically, refreshed on a rolling basis, and scaled back to zero when the cluster is idle. The Quanton and Spark operators run on Auto Mode unchanged.
Use Auto Mode if you want Databricks-style "spin up, spin down, don't babysit" operations. Use the standard EKS guide if you need full control over node groups, custom AMIs, or compute that Auto Mode doesn't support.
Prerequisites
- AWS CLI installed and configured
- eksctl — a recent version with EKS Auto Mode support
- Helm >= 3.x
- kubectl installed
onehouse-values.yamldownloaded from the Onehouse console
Resource and cluster setup
Step 1: Configure AWS credentials
aws configure
Verify you're authenticated:
aws sts get-caller-identity
Step 2: Create the Auto Mode cluster
Create a cluster config file auto-mode-cluster.yaml. Enabling autoModeConfig tells eksctl to provision the cluster with the built-in general-purpose and system node pools and the node IAM role they need — no node group definitions required.
apiVersion: eksctl.io/v1alpha5
kind: ClusterConfig
metadata:
  name: quanton-auto
  region: us-west-2
autoModeConfig:
  enabled: true
  nodePools: ["general-purpose", "system"]
Create the cluster:
eksctl create cluster -f auto-mode-cluster.yaml
This takes ~15 minutes. eksctl creates the cluster, VPC, subnets, and the node role via CloudFormation — but no worker nodes yet.
Step 3: Verify the cluster
kubectl get nodes
It's normal to see no nodes at this point. Auto Mode starts with zero nodes and only provisions them when there are pending pods to schedule — this is the feature that gives you scale-to-zero economics, not a problem. Nodes will appear automatically once you install the operators and submit a job.
You can confirm the built-in node pools are present:
kubectl get nodepools
You should see general-purpose and system.
Step 4 (optional): Tune storage for shuffle-heavy jobs
The built-in general-purpose node pool works out of the box for most Spark workloads — skip this step unless you're running large shuffles. Spark spills shuffle and intermediate data to a node's local disk, and the default Auto Mode node uses EBS-backed ephemeral storage. For shuffle-heavy jobs you can either grow that volume or pin nodes that ship with local NVMe.
This requires a custom NodeClass (where storage is configured) and a NodePool that references it. The simplest path is to reuse the node role and selectors eksctl already created for the built-in node pools — read them off the default NodeClass:
kubectl get nodeclass default -o jsonpath='{.spec.role}'                        # node IAM role
kubectl get nodeclass default -o jsonpath='{.spec.subnetSelectorTerms}'         # subnets
kubectl get nodeclass default -o jsonpath='{.spec.securityGroupSelectorTerms}'  # security groups
Plug those into the NodeClass below. The tag-based selectors shown are illustrative; in practice the default NodeClass selects by subnet/security-group ID for your VPC — copy those exact values so your custom NodeClass lands in the right network.
# nodeclass.yaml — larger, faster ephemeral storage for shuffle
apiVersion: eks.amazonaws.com/v1
kind: NodeClass
metadata:
  name: quanton-spark
spec:
  role: <node-role-name>            # the node role eksctl created for this cluster
  subnetSelectorTerms:
    - tags:
        kubernetes.io/role/internal-elb: "1"
  securityGroupSelectorTerms:
    - tags:
        Name: "eks-cluster-sg"
  ephemeralStorage:
    size: "160Gi"   # range 1Gi–59000Gi
    iops: 6000      # range 3000–16000
    throughput: 250 # range 125–1000
# nodepool.yaml — schedule Quanton Spark pods onto the custom NodeClass
apiVersion: karpenter.sh/v1
kind: NodePool
metadata:
  name: quanton-spark
spec:
  template:
    spec:
      nodeClassRef:
        group: eks.amazonaws.com
        kind: NodeClass
        name: quanton-spark
      requirements:
        - key: "eks.amazonaws.com/instance-category"
          operator: In
          values: ["c", "m", "r"]
        # Prefer nodes with local NVMe for the fastest shuffle (optional):
        # - key: "eks.amazonaws.com/instance-local-nvme"
        #   operator: Gt
        #   values: ["100"]   # at least ~100 GiB of local NVMe
  limits:
    cpu: "1000"
    memory: 1000Gi
Apply both:
kubectl apply -f nodeclass.yaml
kubectl apply -f nodepool.yaml
If you reuse the existing node role (as above), the access entry already exists — skip this. You only need it when you create a brand-new node role: a custom NodeClass with a new role requires an EKS access entry so its nodes can join the cluster. Run once, using that role's ARN:
aws eks create-access-entry --cluster-name quanton-auto \
  --principal-arn <node-role-arn> --type EC2

aws eks associate-access-policy --cluster-name quanton-auto \
  --principal-arn <node-role-arn> \
  --policy-arn arn:aws:eks::aws:cluster-access-policy/AmazonEKSAutoNodePolicy \
  --access-scope type=cluster
To route Spark jobs onto this node pool, add a matching nodeSelector/affinity to your QuantonSparkApplication driver and executor specs. If you skip this step, jobs simply run on the general-purpose pool.
Install the operators
Step 5: Install the Spark Operator
The Quanton Operator extends the kubeflow Spark Operator — install it first:
helm repo add spark-operator https://kubeflow.github.io/spark-operator
helm repo update

helm install spark-operator spark-operator/spark-operator \
  --namespace spark-operator \
  --create-namespace \
  --set "spark.jobNamespaces={default}"
Verify it's running (Auto Mode will provision a node to host it — give it a minute):
kubectl get pods -n spark-operator
Step 6: Install the Quanton Operator
helm upgrade --install quanton-operator oci://registry-1.docker.io/onehouseai/quanton-operator \
  --namespace quanton-operator \
  --create-namespace \
  --set "quantonOperator.jobNamespaces={default}" \
  -f /path/to/onehouse-values.yaml
Verify the pods are running (may take ~30–60 seconds to initialize):
kubectl get pods -n quanton-operator
Expected output once ready:
NAME                                   READY   STATUS    RESTARTS   AGE
quanton-controller-xxxx-xxxxx          3/3     Running   0          60s
If a pod shows PodInitializing or 0/N (not all containers ready yet), wait a moment and re-run the command.
Submit and monitor job
Step 7: Submit a test job
Auto Mode (Karpenter) consolidates "underutilized" nodes by default — and that will evict a running Spark driver or executor and fail the job. Always mark Spark pods undisruptable with the karpenter.sh/do-not-disrupt: "true" annotation on both the driver and executor (shown below). Karpenter then leaves those nodes alone until the job finishes, and reclaims them once they're empty. (As an alternative or in addition, run Spark on a custom NodePool with disruption.consolidationPolicy: WhenEmpty.)
Save the example spark-pi job — with the consolidation-protection annotation — as quanton-application.yaml:
apiVersion: quantonsparkoperator.onehouse.ai/v1beta2
kind: QuantonSparkApplication
metadata:
  name: quanton-spark-pi-java-example
  namespace: default
spec:
  sparkApplicationSpec:
    type: Java
    mode: cluster
    image: "dist.onehouse.ai/onehouseai/quanton-spark:quanton-operator-release-v0.2.0-al2023"
    imagePullPolicy: IfNotPresent
    mainClass: org.apache.spark.examples.JavaSparkPi
    mainApplicationFile: "local:///opt/spark/examples/jars/calculate-pi-example_2.12-3.5.0.jar"
    arguments: ["100"]
    sparkVersion: "3.5.0"
    restartPolicy:
      type: Never
    driver:
      cores: 1
      coreLimit: "1200m"
      memory: "1024m"
      labels: { version: "3.5.0" }
      annotations:
        karpenter.sh/do-not-disrupt: "true"
      serviceAccount: spark-operator-spark
    executor:
      cores: 1
      instances: 2
      memory: "1024m"
      labels: { version: "3.5.0" }
      annotations:
        karpenter.sh/do-not-disrupt: "true"
kubectl apply -f quanton-application.yaml
Confirm the application was created:
kubectl get quantonsparkapplications -n default
Monitor the driver pod. The first run may take a few minutes — Auto Mode is provisioning a node and the Quanton image is being pulled:
kubectl get pods -A | grep driver
You can also track the job in the Onehouse console under Jobs:
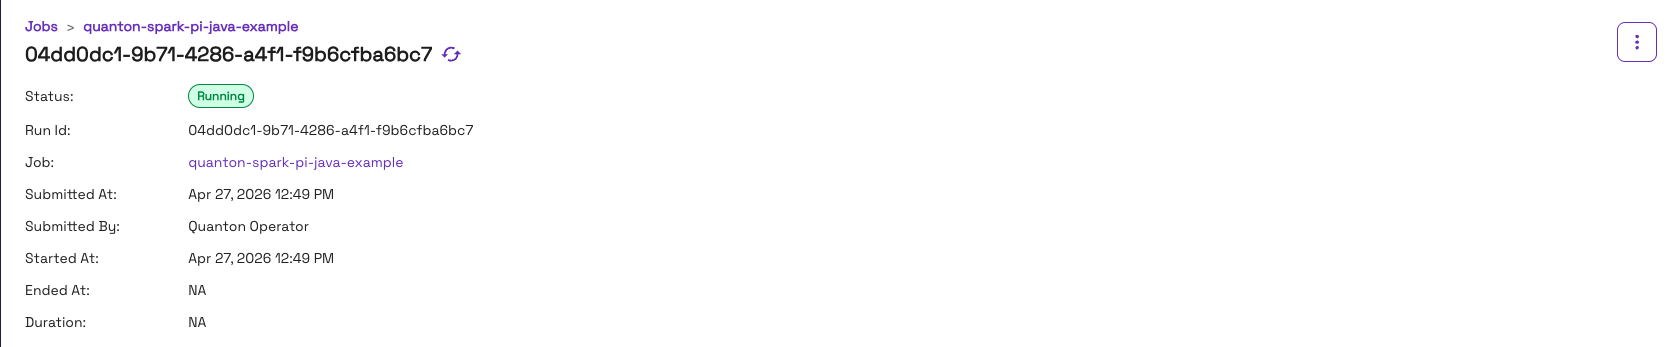
Once running, check the output:
kubectl logs -f quanton-spark-pi-java-example-driver | grep -i "pi is"
Expected output:
Pi is roughly 3.141592...
Once the job finishes, the console will show it as Completed:

When the job ends and no pods remain, Auto Mode automatically removes the node it provisioned — the cluster returns to zero worker nodes.
Troubleshooting
ImagePullBackOff on quanton-controller
If kubectl get pods -n quanton-operator shows ImagePullBackOff on the quanton-controller pod, check the events:
kubectl describe pod -n quanton-operator <quanton-controller-pod-name> | grep -A 30 "Events:"
A TLS handshake timeout pulling from dist.onehouse.ai can indicate the EKS nodes can't reach the Onehouse image registry — or may be a transient failure that resolves on retry. First wait a minute and re-check pod status. If it persists, verify connectivity from inside the cluster:
kubectl run nettest --image=busybox --restart=Never -- \
  sh -c "wget -qO- https://dist.onehouse.ai 2>&1 || true" && \
  kubectl wait --for=jsonpath='{.status.phase}'=Succeeded pod/nettest --timeout=30s 2>/dev/null || true && \
  kubectl logs nettest && \
  kubectl delete pod nettest
A 404 Not Found response confirms connectivity is working. See Network Configuration for the full list of required endpoints.
Pods stay Pending and no node appears
On Auto Mode, a node is provisioned only when a pod is schedulable but pending. If a pod stays Pending, describe it to see why Auto Mode hasn't launched a node:
kubectl describe pod <pod-name> | grep -A 20 "Events:"
Common causes are resource requests no instance can satisfy, or a nodeSelector/affinity that doesn't match any node pool (for example, pointing at a custom node pool whose NodeClass is missing its access entry).
Job fails mid-run with "driver pod not found"
If a Spark job runs for a while and then fails — with the operator reporting driver pod not found or executors FAILED, and the cluster events showing Evicted pod: Underutilized / Disrupting Node: Underutilized — Auto Mode consolidated the node out from under your running Spark pods. Add the karpenter.sh/do-not-disrupt: "true" annotation to the driver and executor specs (see Step 7). You can confirm the fix is active when the events instead read DisruptionBlocked … Pod has "karpenter.sh/do-not-disrupt" annotation.
Cleanup
To stop all charges, delete the cluster:
eksctl delete cluster --name quanton-auto --region us-west-2
You don't have to delete the cluster to control cost, though — because Auto Mode scales worker nodes to zero when idle, an unused cluster only incurs the EKS control-plane fee plus the Auto Mode management fee, with no idle EC2 charges.
Next steps
- Running Jobs — submit your own
QuantonSparkApplicationresources - AWS integration reference — S3 access via IRSA and production setup
- Standard EKS guide — if you need to manage node groups yourself